Below is the current list of Amazon Alexa Smart Home Skills integratable with your Amazon Echo as of June 16th, 2020 in order by current release date. TP-Link Router by TP-Link Sleepace Nox by SLEEPACE LLC Blackstone by eWeLink support Mighty Mule by GTO Access Systems LITEdge - from Torchstar by Torchstar Corp 1B Vent Hood by First Build Chuango by Chuango Security Technology Corporation tiktecklab wifi socket by rex Stellar Wi-Fi by Sansitech CasaTunes by CasaTunes Smanos by smanos inc. Smart Oil Gauge by Connected Consumer Fuel B One VoiceAct by Blaze Automation Inc Viotek SmartHome by eWeLink support AeraForHome by Prolitec Arrayent by Arrayent Sparkplug By CreateAbility Adobe Smart Home by adobe systems, inc. Rainrobot by Unknown Eneco Chatbot by Qdraw TXU iThermostat Skill for Amazon Alexa by TXU Energy Logic Machine by Embedded Systems SIA Aquarium Light by EvilHogg Jenn-Air Connected Ovens by Whirlpool Corporation spott by GTO Access S...
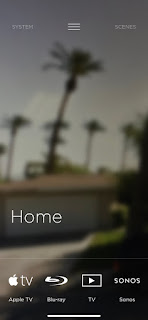
Savant systems automation has updated their Pro 8 software with the DaVinci 8.7.1 update which is an update with software additions and bug fixes. Below is a list of the items included in the Savant update. Support for iPhone X Requested enhancements and fixes New Features and Hardware Available with daVinci 8.7.1 Software Update Savant Smart Bulbs and LED strips with TrueImage Lighting Savant IP Video and Audio Distribution Savant Pro Remote Multi-Room - REM-2000 Scene assignment to a Metropolitan keypad button Savant Shades Savant Touch in-wall and tabletop control screens Door lock and garage door services Amazon Alexa Support See below for the full Savant DaVinci 8.7.1 Release Notes.
To wire Crestron Cresnet properly you are suggested to use Crestron's standard Cresnet cabling which consists of 4 conductors to operate correctly. You will need a small flat head screw driver called a tweeker to unscrew the 4 small screws of the green phoenix connector to be able to insert your stripped back wire ends. The Red wire is for the power of the Cresnet communication bus which is 24VAC. The White wire is the Y communication of the RS-485 bus which is the positive side of communication pair. The Blue wire is the Z communication of the RS-485 bus and this is the negative side of the bus pair. Finally the Black wire is the ground side of the power pair to complete the Cresnet connections and wiring. Once the wires are inserted into the Pheonix connector you will use your tweeker screw driver to fasten the wire to the phoenix connector as seen below in the picture to be able to connect whichever device you are hooking up....
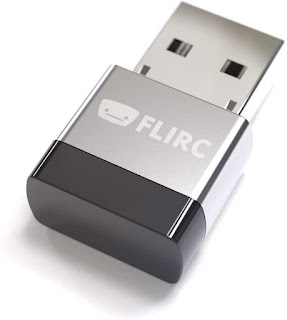
When attempting to control and integrate an NVIDIA Shield with the use of a universal control you will need the help from the Flirc USB Dongle to accomplish the task which is readily available on Amazon's Online Store . When setting up the Flirc adapter you are able to configure the USB dongle and learn the IR codes that you would like to use to control your NVIDIA Shield with the downloadable Flirc configuration software. The Flirc dongle and software together learn the IR codes from any remote and allow them to control the functions of the NVIDIA Shield which are set one at a time. Once the setup has been completed with all the IR codes learned into the Flirc adapter you finalize the configuration and the dongle is ready to be plugged into the NVIDIA Shield in an open usb port. Essentially now you have an IR receiver located off the usb port for you to use as you wish. The Flirc USB dongle also is compatible in controlling...


Comments
Post a Comment